
This guide shows you how to create a product category in RAAD ERP. After you save, the category appears in your Product Categories list.
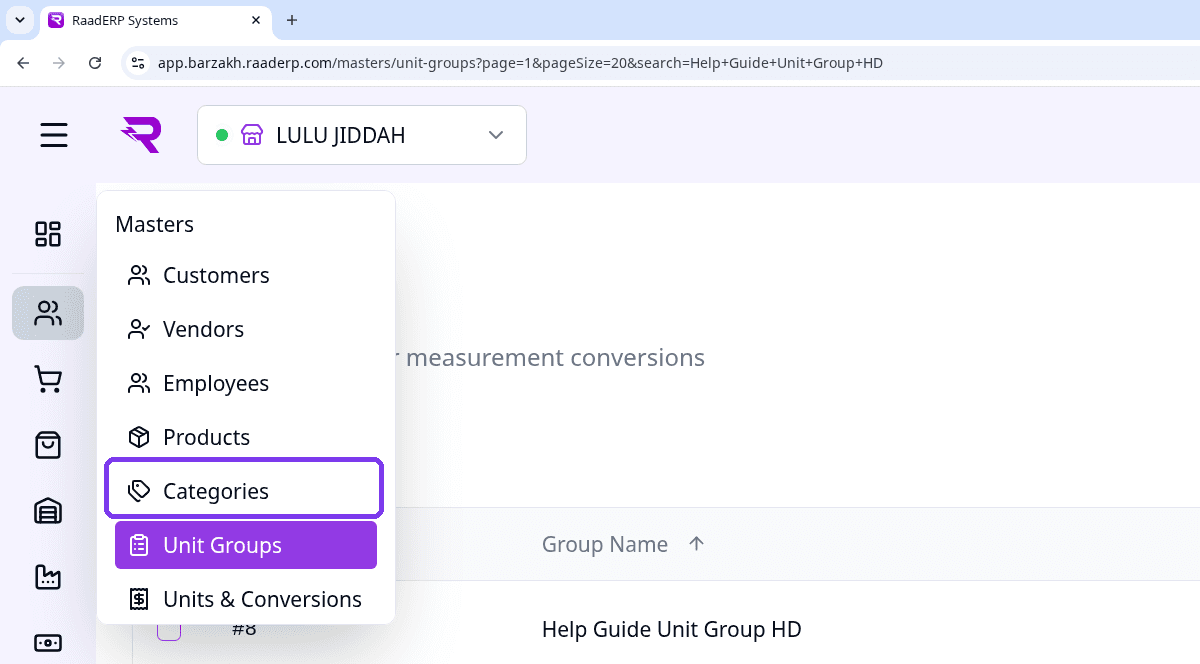
Go to: Masters > Categories
Step 1: Open the Masters menu
On a computer, point your mouse at the people icon in the left sidebar. On a phone, tap the menu button (☰) at the top left, then tap Masters. The Masters menu opens.
Step 2: Select Categories, then click + Add Category
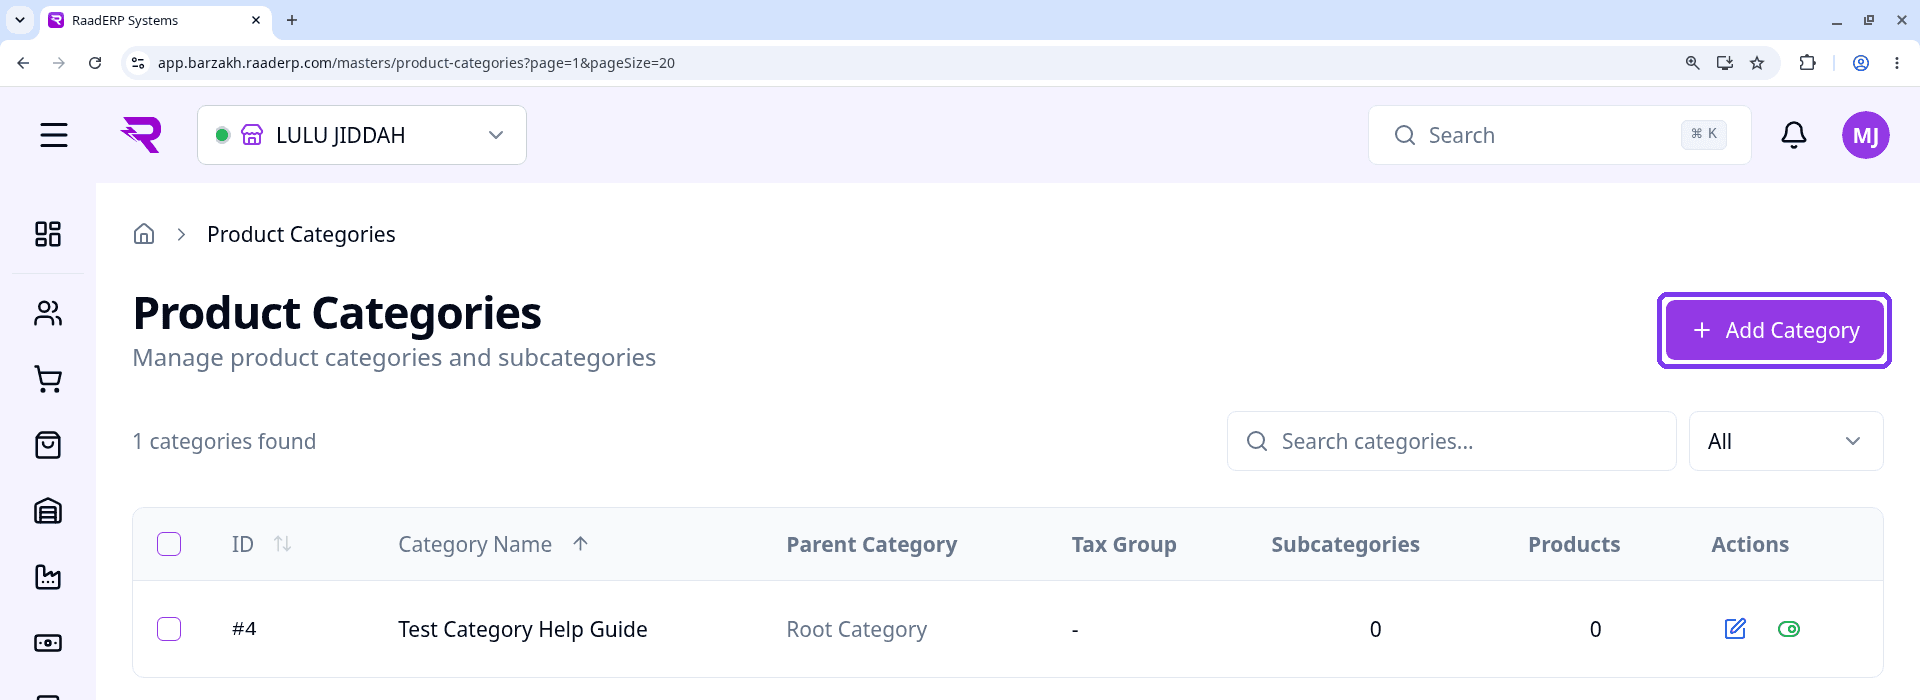
In the Masters menu, click Categories. The Product Categories page opens.
Click + Add Category at the top right. A form opens on the right.
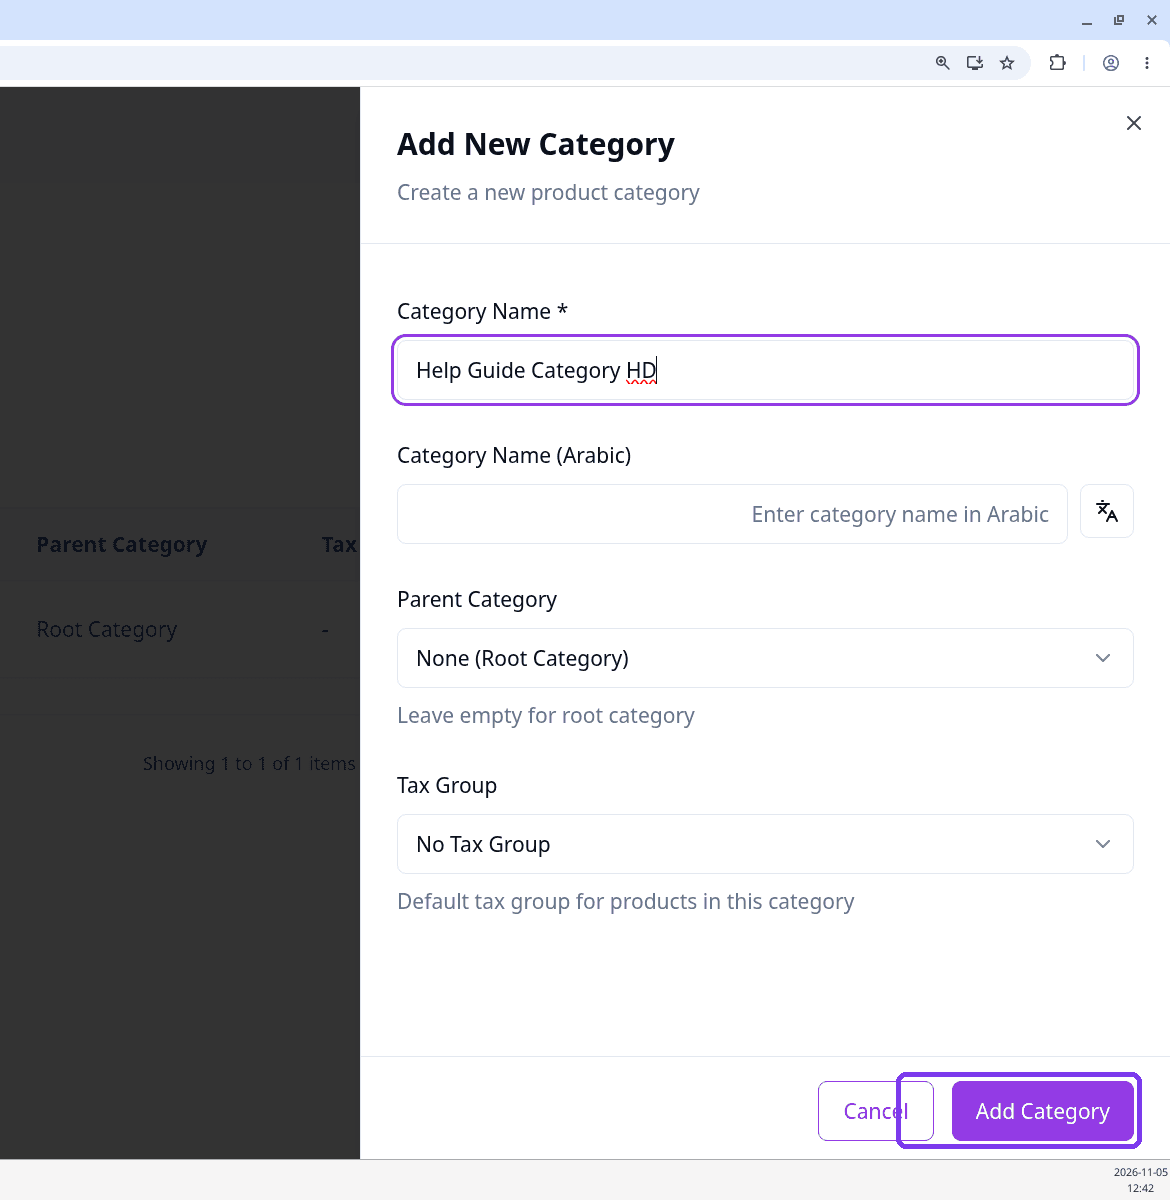
Step 3: Enter the category name
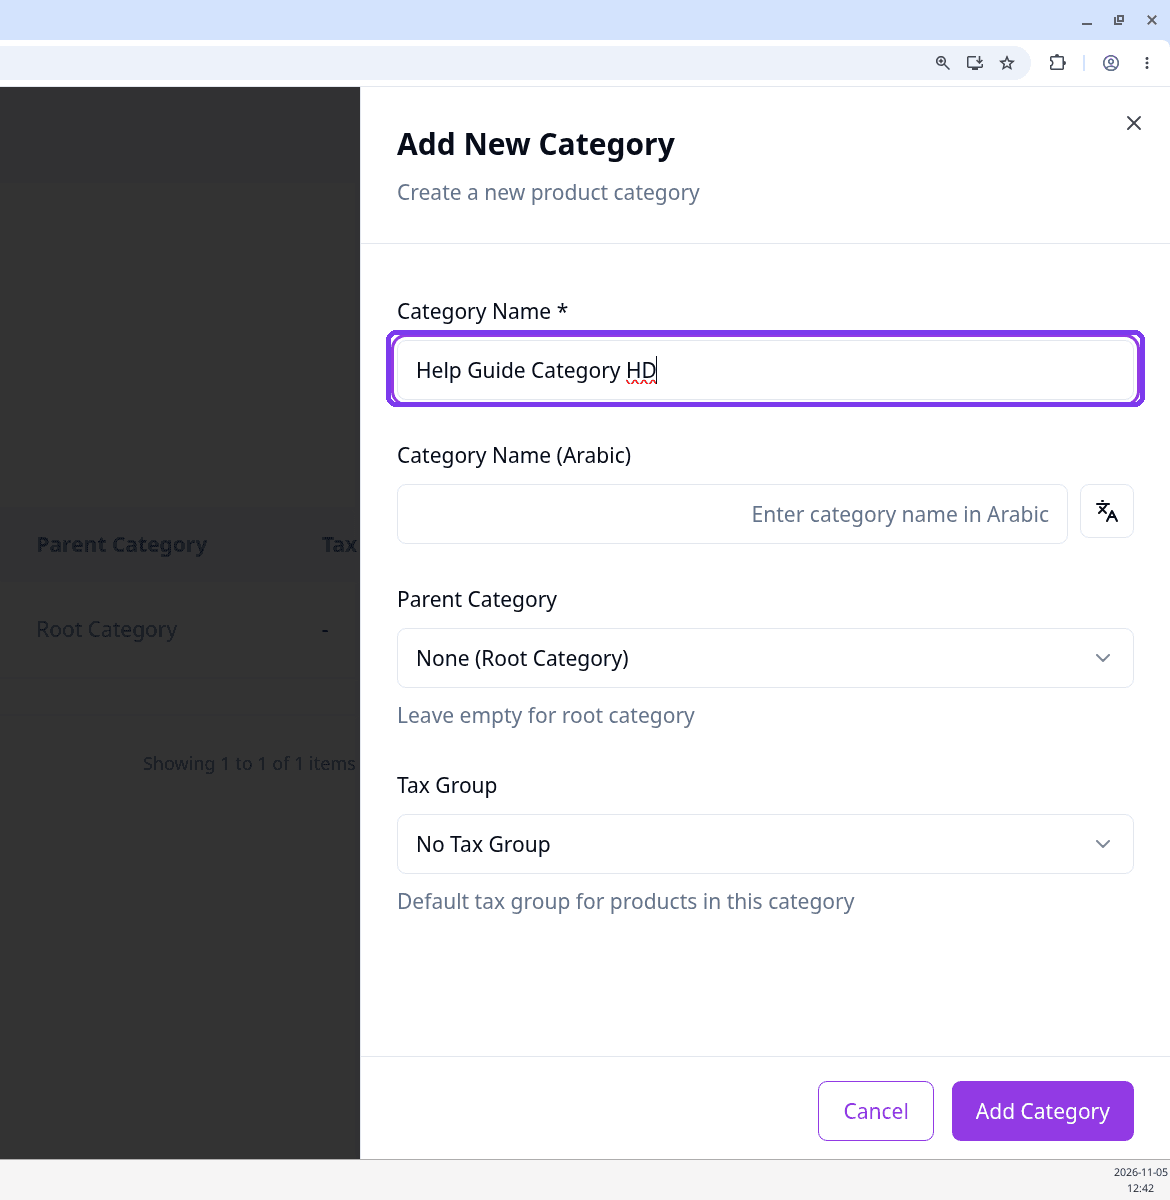
Type the Category Name. This is the only required field.
The Arabic name is optional.
Step 4: Choose the parent category and tax group
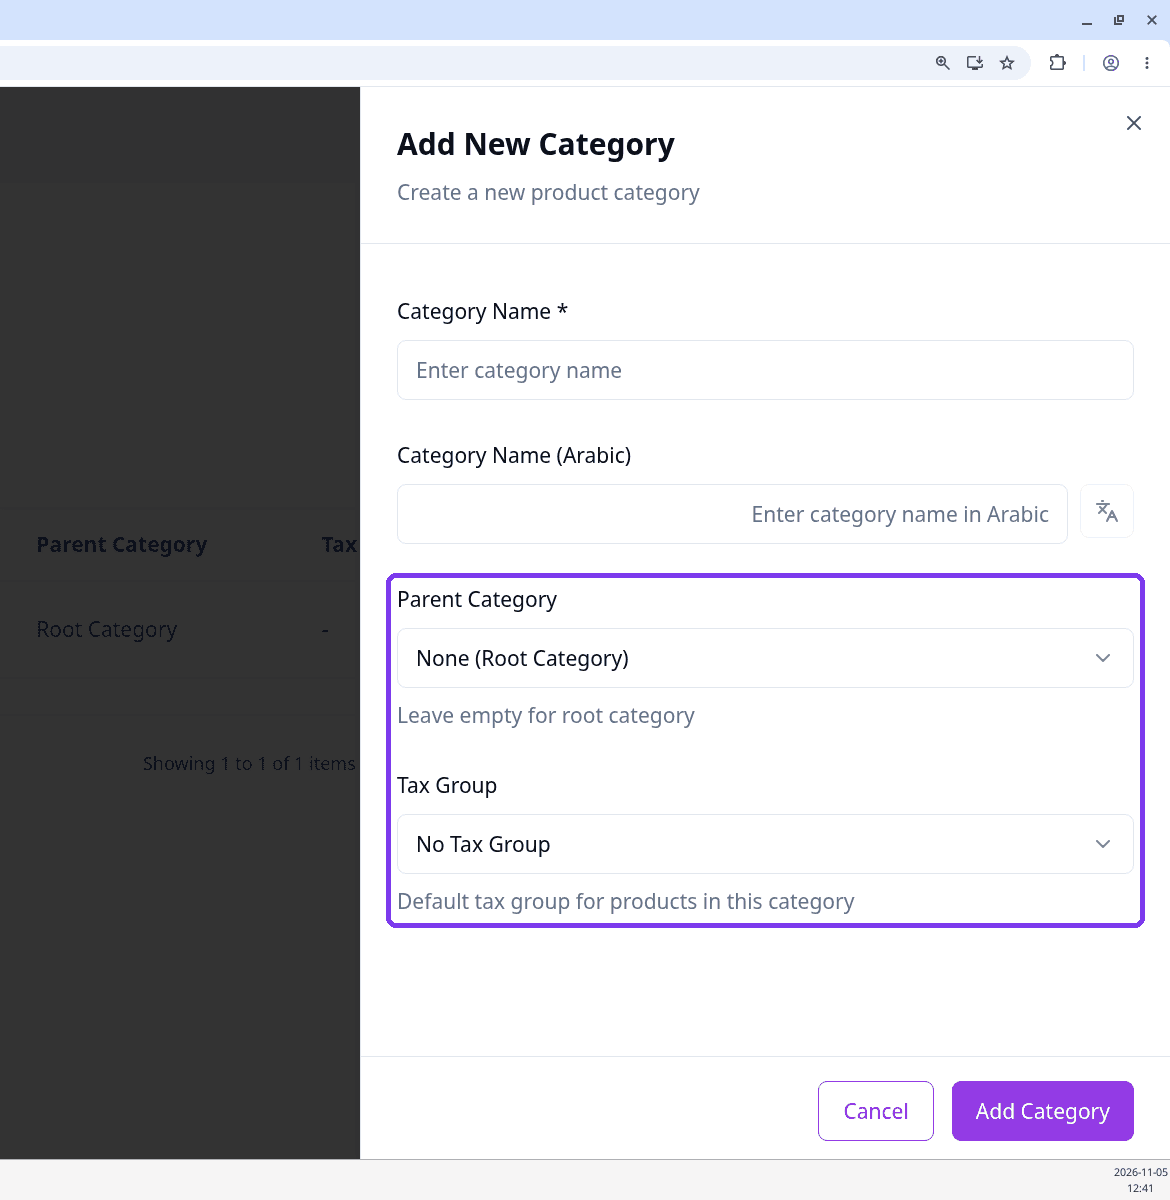
If this is a subcategory, choose its Parent Category. Leave it as None (Root Category) to create a main category.
If needed, choose a Tax Group. This is the default tax group for products in this category.
Step 5: Click Add Category to save
Click Add Category at the bottom of the form.
You will see the message "Category created successfully".
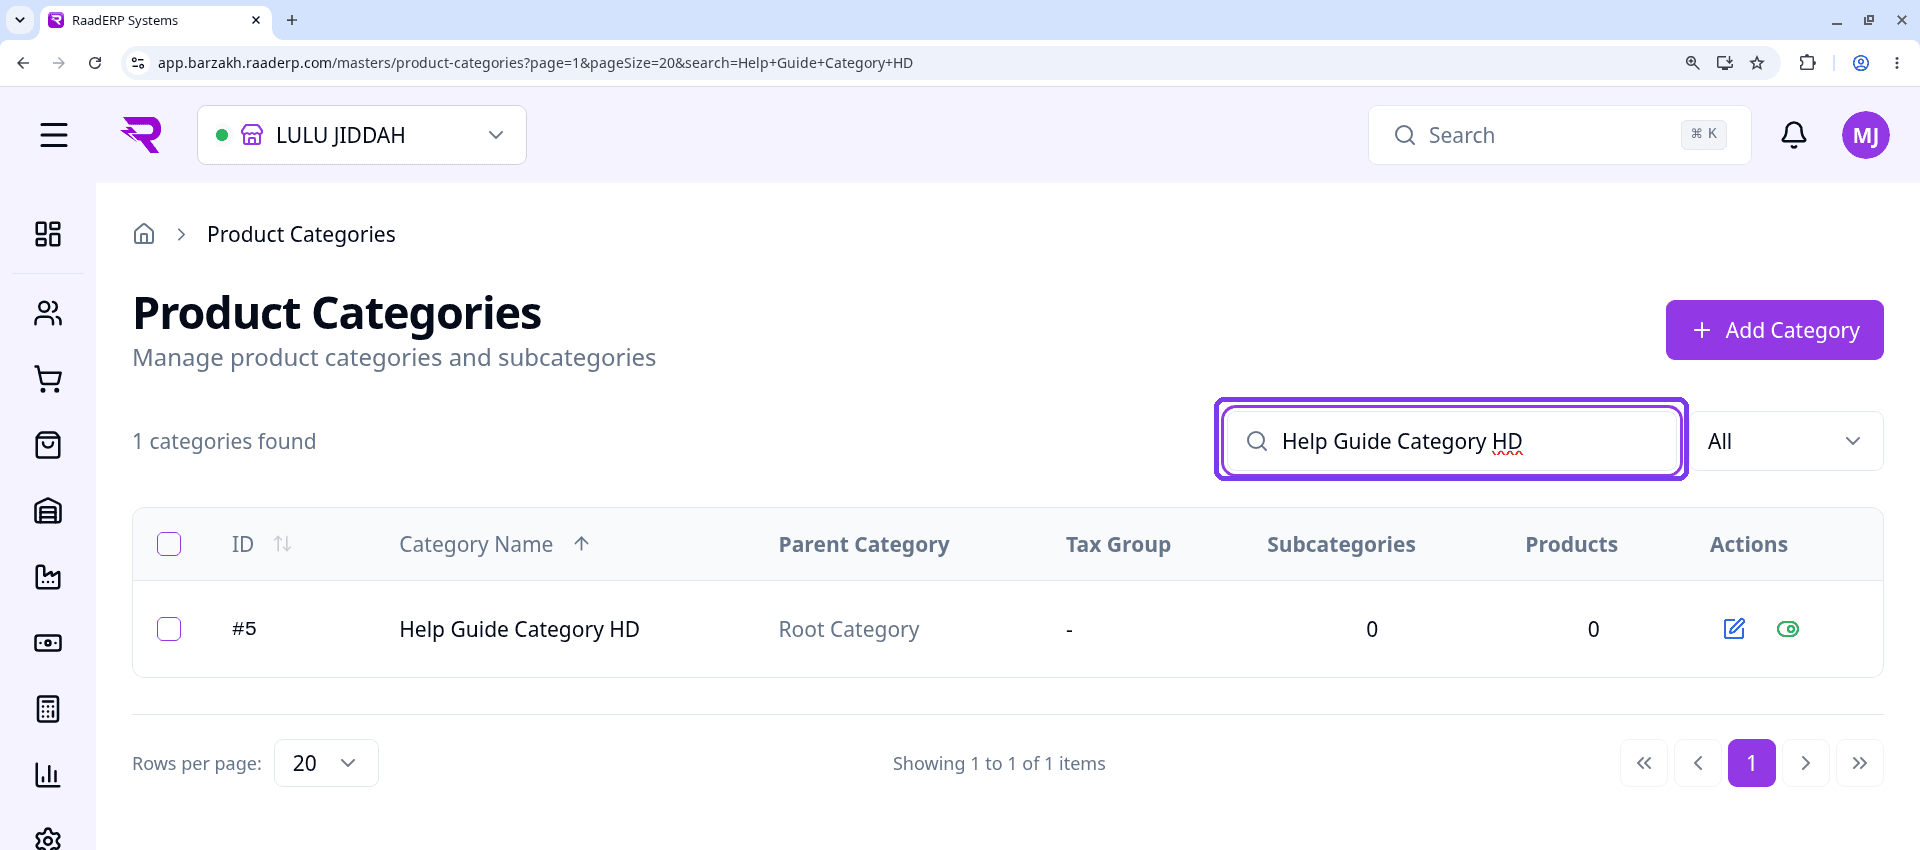
Step 6: Find the new category in the list
Your new category now appears in the Product Categories list. To find it, type its name in the search box.
Important Notes
- Fields marked * are required. Only Category Name is required.
- Leave Parent Category empty to create a main (root) category.